


Now we’ve covered the basics we can start doing fun things with Bit:Bot. In this example we will turn Bit:Bot into a line following robot.
We need to write a method so we can control Bit:Bots motors. The motors are connected to pins 0, 8, 1 and 12.
- Left speed control = pin 0
- Left direction = pin 8
- Right speed control = pin 1
- Right direction = pin 12
The direction pins are digital inputs with values of 1 or a 0 and the speed pins are what’s known as PWM outputs. This means that they output a analogue signal that can range between 0 and 1023 (10 bits). This signal can control the speed of the motors. When the motors are going forward the bigger the signal the faster the motor. When the motors are going backwards this is inverted so the bigger the signal the slower the motors. Copy and paste the below code into Mu;
Most of this code should look familiar to you. I have assigned the motor pins for speed and direction. I have also added a method called move(); this method will be invoked when we want Bit:Bot to move in a specified direction. I have an if statement that has the != operator. This means not equal to it will become apparent later why I have added this.
move() has 4 arguments leftSpeed, rightSpeed, leftDirection and rightDireciton. The speed values will be between 0 and 1023 high == faster when going forward and slower when going backwards. leftDirection and rightDireciton can have the value of 0, 1 or 2. 0 will make the motors go forwards, 1 will make the motors go backwards and 2 won’t change the motor direction. We can use this to make Bit:Bot go forwards. backwards, left and right.
To break this down further I will add the following helper methods;
- drive(speed)
- sharpRight()
- sharpLeft()
- gentleRight()
- gentleLeft()
- coast()
- stop()
All of these methods are self explanatory apart from the coast() and drive() method. The coast() method will not change the direction of the motors it will just set the speed to 0 so they can still rotate; a soft stop. Whereas the stop() method will stop the motors. The coast() method should be used between changing direction to give the motors time to slow down and settle before the change of direction prolonging their life and stopping power spikes. The drive() method will drive Bit:Bot either forwards or backwards; positive speed for forwards and negative speed for backwards.
By having these extra helper methods we can concentrate on efficient line following algorithms without having to worry about what values to use with the move() method (it can be confusing). We can just call one of the above helper methods instead. I will add the code below for these methods;
Add the above code under the move() method. We don’t need to worry about the numbers now, we have a drive() method that will accept positive and negative speed arguments. Positive for forwards and negative for backwards. We have turning methods for both gentle and sharp turns and we have a stop() and a coast() method. These methods will make our line following algorithm easier to read. Now we have all our methods all we need to do is to add the line following algorithm.
The robot will look at its IR sensors the left sensor, then the right sensor. If both sensors see no line it will move forwards and repeat this until one of the sensors sees a line. When one of the sensors sees a line the robot will turn in that direction. So for instance if the robot see a line on its left it will turn left. This will hopefully mean that the line will then be in the middle of the robot. If the robot overshoots it doesn’t matter because the right sensor will see the line and move the robot right. If both sensors see a black line the robot will stop. The program loop with this code is sown below;
The above code is way more complicated than it should be but it was the only way I could get it to work. Firstly it looks for a line, when a line is found the Bit:Bot will carry out a sharp turn for 200mS. This is because if the robot carries out a gentle turn initially the robot would move in such as way that the IR sensor would be at the other side of the line (after the robot moves) and the robot would go the wrong way. Once the sharp turn is complete it will carry out gentle turns until the IR sensor can not see the line, then the robot will go forward.
The NeoPixels will light red when the sensor sees a black line. If both sensors detect a black line at the same time the LEDs will turn a cyan colour and the Bit:Bot will stop.
I had a lot of issues creating the above code. If you use Mu to upload the code to your Micro:Bit it will not behave as it should. For some reason when using Mu and the motors on the Bit:Bot the Micro:Bit locks up and the motors rotate at their maximum speed. To avoid this I used the online MicroPython editor to upload the code. It can be found at the following URL;
https://python.microbit.org/v/2 (MicroPython editor)
Once the code is entered a hex file can be created and dragged on to the Micro:Bit in the usual way. More about this issue can be found here if your interested https://github.com/bbcmicrobit/micropython/issues/391
Although the above code will follow a simple track, it will have issues if complex scenarios are met. For instance if a T junction is seen by both sensors the robot will stop. To develop the code further we need to decide how the robot will behave if complex situations occur.
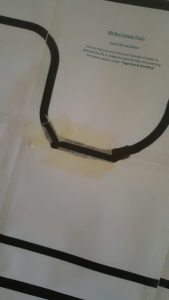
Upload the code to your Micro:Bit and see how it behaves on the track I’ve included. You can download the code and the track from the links at the bottom of this page or from the Resources page. The track should be opened using Acrobat Reader, when printing, select poster and it should be printed on 6 pieces of A4 paper. Tape the paper together and colour the gaps in with a black marker then see how Bit:Bot navigates the track. Change the code and see what affect it has. Remember to upload the code using the online editor rather than Mu.
I printed the track on card initially and Bit:Bot couldn’t see the lines properly (using a laser printer). I had to use paper to get Bit:Bot to work correctly. Bit:Bot struggled to see marker pen so on the middle bit of the track where you have to colour quite a bit of the line in I had to cut a black line out and tape it to the track over where the line should be. Its not pretty but it worked!
Maybe you could change the code so the Bit:Bot behaves differently when complex situations occur such as T junctions or noisy tracks. If you do put your code in the comments. I will try and design a few different track layouts and change the above track so the corner isn’t over 2 pages. I will also add a more advanced line follower to the code file when I get time to write it.
The complete code listing can be seen below;
You have done really well and now we have a robot that can follow lines. Before moving onto the next example make sure you understand the code; change the code and try to improve it and when your ready move on to the next example. If you have any issues or have/find any tracks stick them in the comments section.
The below zip file contains the code for this project and the track. I have also included a stand alone link to the track.